
I remember walking along the banks of river Bui some years ago with my friend while having a scintillating conversation. As we took a bend, we were stopped on our tracks at the sight of the most beautiful group of flowers.
The striking thing about these flowers, wasn’t their bright mesmerizing petals and pleasant smell, but the fact that, we had just studied them in class the previous week.
I was excited to show off to my friend that I knew something about them that she didn’t. So I started blabbing biologically.
“What’s its name?” she asked. I froze. My mind went hunting deep into my memory unsuccessfully trying to recall the name of the flower for which I thought i had so much expertise. I was freaking embarrassed.
It was a Hibiscus for Christ sake!!
If you are like me, and can’t remember names of flowers or anything, there is always a way and permit me to show you how.
In this article, you will learn how to build a multiclass machine learning classifier of plant species. By the end of this post, we will be able to distinguish between 4 types of flowers - sunflower, Crocus, Daises, and Pansies.
General Project Outline.
For a newbie into machine learning, the different parts that constitute the entire project might seem confusing and overwhelming. So to make things simple and easy to understand, here is an outline of the steps we will be implementing shortly in code.
This project follows the traditional machine learning paradigm which is :
-
Data Acquisition: We will be using a dataset containing images of four different classes of flowers i.e sunflower, daises,pansies and Crocus.
-
Data preprocessing: We do not have much of preprocessing to be done here. We transform the string flower names to a unique integer values using the famous label encoding technique.
-
Feature Description and Extraction: Given the unique distribution of the bright colors of each flower species, we will be using 3D color Histogram to describe and extract important features from each image in our dataset.
-
Model Classification: This is the cardinal part of the project. Here we will split out dataset into train and test split. The train split will be fitted to a RandomForestClassifier. This classifier will then be validated using the Test set. Finally, we can use our amazing model to predict the names of some random images downloaded from the web.
With this out of the way, let’s get down to the fun part.
Requirements
For this project, the core libraries we will use are OpenCV, scikit-learn. I am running my code on jupyter notebook. The code is written using python 3. Feel free to use whatever environment is suitable for you, but make sure that, opencv has been installed properly depending on the computer system you are using.
Dataset Description
The dataset is made of 234 images of four plant species - Crocus, Daisy, Pansies, and Sunflower. I also have a dataset of corresponding image mask of the plant images. You can find the link to the dataset at the end of this post.
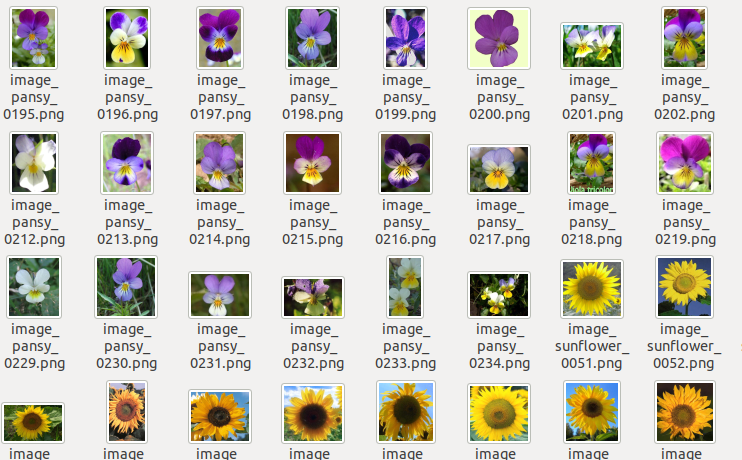
Sample images from the Flower Dataset
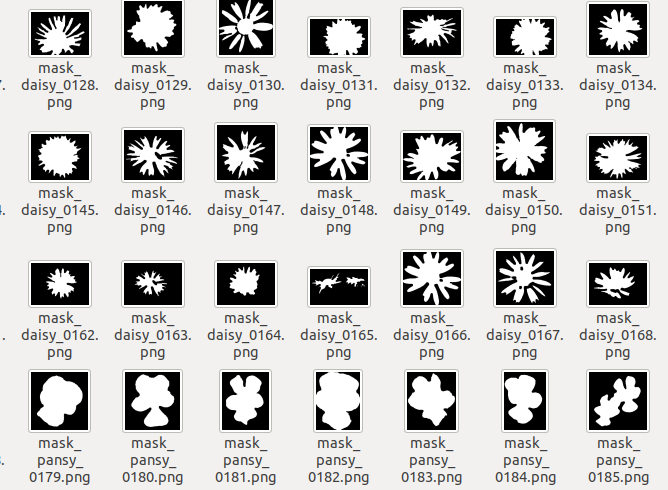
Sample Images from the Flower-Mask Dataset
Step 1: Import relevant Libraries
import cv2
import numpy as np
from sklearn.ensemble import RandomForestClassifier
from sklearn.preprocessing import LabelEncoder
from sklearn.model_selection import train_test_split
from sklearn.metrics import classification_report
import matplotlib.pyplot as plt
import glob
We need access to openCV built-in methods, so we import it as above. Scikit-learn library is imported to take advantage of it’s powerful machine learning methods. Numpy library is always handy for mathematical manipulations. Matplotlib is used to display the images in jupyter notebook.
Step 2: Read Image and Mask Dataset.
imageDir = '/home/beltus/image/Computer_Vision/Plant_Classification/dataset/images'
maskDir = '/home/beltus/image/Computer_Vision/Plant_Classification/dataset/masks'
#read the paths to plant images in a sorted format.
imagePaths = sorted(glob.glob(imageDir + "/*.png"))
maskPaths = sorted(glob.glob(maskDir + "/*.png"))
Get a sorted list of the names of all images and masks in the dataset using the sorted(glog.glob(‘path_to_folder’))
Step 3: Feature Description and Extraction using 3D Color Histogram
#method to extract the histogram features from each input image
def extract(image , mask , bins):
    #extract histogram features from image
    hist = cv2.calcHist([image], [0,1,2] , mask , bins , [0, 256, 0 , 256, 0 , 256])

    #normalize the features
    hist = cv2.normalize(hist, hist)

    #convert and return extracted features as a vector
    return hist.flatten()
##end of method

bins = [8,8,8]

#list to hold all the extracted features from the dataset of flowers
feature_list = []

##List of the different flower class names
target = []

for (imagePath , maskPath) in zip(imagePaths, maskPaths):

    #read image with corresponding path
    image = cv2.imread(imagePath)
    mask = cv2.imread(maskPath)

    #convert mask to grayscale
    maskGray = cv2.cvtColor(mask , cv2.COLOR_BGR2GRAY)
    #Extract features from the image region specified by the mask using the RGB Histogram descriptor
    histFeatures = extract(image, maskGray , bins)

    feature_list.append(histFeatures)

    ##extract the flower class name from image path and appended to list
    target.append(imagePath.split('_')[-2])

#get unique flower names-class names from the target list
targetSpecies = np.unique(target)
To make coded cleaner, I defined the extract() method to encapsulate the opencv histogram function. Histograms can be used to characterize images pretty well. For more information on this click here.
A mask is used so that only the histogram of the petals of the flowers are characterized and not the entire image. This is just for better performance and accuracy. The code is well-commented for easy understanding.
Step 4: Label Encoding
## Transform Target Names - Label Encoder
from sklearn.preprocessing import LabelEncoder

#initialize the encoder class
label_encoder = LabelEncoder()

#convert string names to integers
transformed_targets = label_encoder.fit_transform(target)
We need to convert the string names of the flowers to integers using the scikit label encoder for our model to be able to understand and correctly classify the different plant species.
Step 5: Split the Dataset For Cross Validation
from sklearn.model_selection import train_test_split

(trainInput, testInput , trainOut, testOut) = train_test_split(feature_list, transformed_targets , test_size = 0.3, random_state = 42)
The input and corresponding targets are then split to train and test split using the scikit-learn train_test_split method.
Step 6: Training of RandomForestClassifier Model
#initialize Random Forest Classifier
model = RandomForestClassifier(n_estimators = 25, random_state = 84)

#train the model
model.fit(trainInput, trainOut)
Next we simply fit our RandomForest Classifier using the training split of our dataset.
Step 6: Prediction of Flower Species
#model prediction
predict = model.predict(testInput)
# Classification Report
print(classification_report(testOut , predict , target_names = targetSpecies))
Finally, using the test split, we can then evaluate how well our classifier is performing using the classification_report method.
Here is a screenshot of the performance of our model on the test Split.
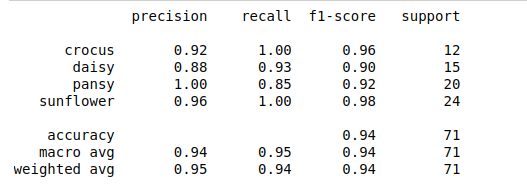
From the results above, looking at the precision column, our random forest classifier is able to classify a Crocus correctly 92% of the time, a Daisy 88% of the time, a pansy 100% of the time, and a Sunflower 96% of the time.
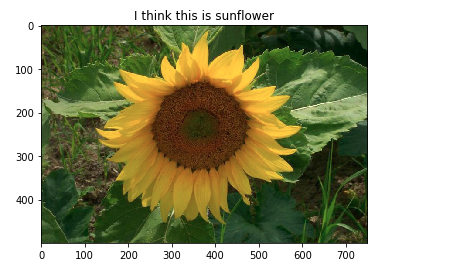
Step 7: Test On Random Images.
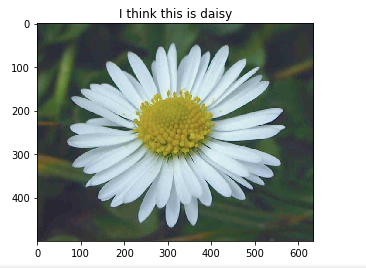
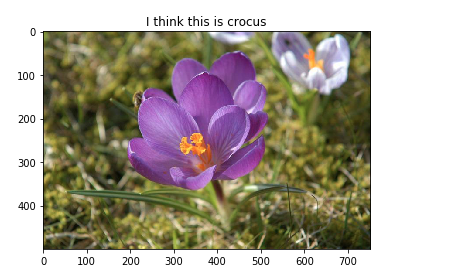
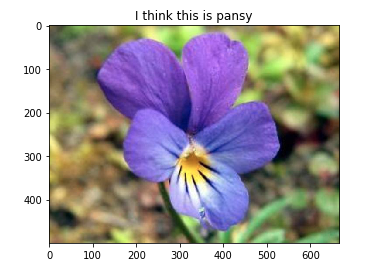
Here are the results obtained when our model is used to predict random flower species.
I hope you had fun implementing this cool project with me. If you have any questions, please, leave a comment below, I will be happy to help. Make sure you subscribe so you can get notified immediately I drop another fun project.
Stay safe.
- Link to Datasets
- For the complete code, visit my github page.
Leave a comment